Sunday, August 4, 2013

6th Airborne Fail to Drive 352 ID off of Monument Hill


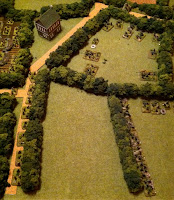
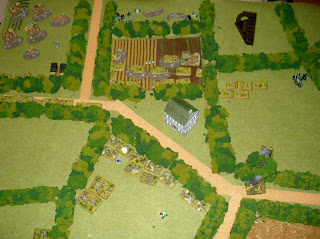
We wanted to get one last game in for Operation Overlord and Lt. Ian Moore wanted to field his British Airborne. We decided that the British would try to drive the Germans off Monument Hill since the Americans failed in our previous game. We chose the Surrounded scenario and Ian elected for a night attack.
352 Fusilier Company

British Parachute Rifle Company


Setup

The German infantry platoons were arrayed through the housing units in town with a StuG platoon on the east and a StuG platoon supported by Pak40s to the west.
The 6th Airborne approached the town from the east and west. The eastern attack included 2nd platoon (parachute platoon) and an anti-tank platoon. The western attack included 1st platoon, an armoured recce platoon (cromwells), a mortar platoon and an artillery platoon.


Turn 1

The British advance under the cover of night. The anti-tank guns destroy a StuG on the eastern edge of town while the StuGs on the western end destroy a Cromwell and bail two others.


Turn 2

Anti-tank guns score 3 hits on the StuG platoon on the east, but all three bounce. Return fire from the German 3rd Fusilier platoon destroys one of the anti-tank guns. On the western edge of town, the StuGs destroy another Cromwell.

Turn 3

Day breaks (during the German turn) revealing the full British assault. On the eastern edge of town, heavy MG fire destroys two more anti-tank guns after suffering light casualties from the guns.

The Germans get aggressive on the western edge. As the Cromwells pull back, the StuGs race forward and take out three teams of first platoon. However, the StuGs fail their stormtrooper move and are left hanging in the wind.


Turn 4

The remaining anti-tank gun falls back and the eastern edge of town goes silent. However, the whistle and thunder of incoming artillery announces to everyone that observers are in place. Artillery fire destroys one Pak40 and two MG teams, pinning three platoons.

Around Monument Hill, the remaining Cromwells bail one StuG, and 1st platoon charges forward to assault the StuGs. The StuGs manage to pin the parachute platoon (6 dice, 5 hits) and destroy two more teams. With the parachute platoon pinned, the StuGs turn around and fire on the Cromwells, destroying one and bailing the other.


Summary

Lt. Ian Moore decided that he was not going to be able to take either objective and withdrew his troops, giving the Germans a 4-3 victory.

Friday, August 2, 2013

Battle for Monument Hill

Reading other Operation Overlord battle reports inspired me to try something new. In particular, this link off of one of the comments on the OO forum caught my eye and started me thinking: http://www.star-forge.com/index.php?name=PNphpBB2&file=viewtopic&t=6899

Here's my attempt at something similar...


Saturday, July 20, 2013

21st Panzer Division Resists Bloody Assault by Irish Guard

Setup

Scenario

No Retreat - Irish Guard attacking, 21st Panzer Division defending

Forces

Irish Guard (British Armoured Squadron - Guards Armoured Division)
HQ, 2x Armoured Platoons, 2x Lorried Rifle Platoons, 1x Royal Artillery Field Battery, Air Support

21st Panzer Division (Panzergrenadierkompanie)
HQ, 3x Panzergrenadier Platoon, 1x MG Platoon, 1x Heavy Anti-Tank Platoon, 2x Panzer Platoons

Initial Deployment

Deployment

The Germans deploy two infantry platoons in a thin defensive line at the edge of town. The PaK40s are in ambush while the remaining infantry platoon and two Panzer platoons are held in reserve. The Guards deploy in two assault groups, each with one armoured platoon and one rifle platoon.

View from outside town

Turn by Turn

Turn 1

The Germans sit tight as the Guards begin their advance. The third German infantry platoon shows up from reserve.
German Defensive Line

Turn 2

Both side exchange shots as the PaK40s are deployed from ambush. A Sherman explodes on the left flank.

Ambush!

Turn 3

Guards Destroy a Panzer Platoon
The 25 pounders start hammering the center of the German lines while Typhoons strafe the flanks. All three German infantry platoons duck for cover. However, they are relieved at the site of two Panzer platoons joining the fight. The Brits take a pounding losing two tanks.

Turn 4

On the eastern flank the Brits stand their ground, destroying a Panzer platoon. However, they lose a Firefly and the infantry are getting chewed up by MG fire.

Turn 5

Things looks grim for the Guards. They lose the entire western assault (armoured and rifle platoon) and the remaining infantry platoon on the eastern flank.

Turn 6

The Lieutenant from the Irish Guard rallies his troops and races his remaining four Shermans forward to assault the eastern objective, driving a panzergrenadier platoon out of its defensive position. The Germans scramble to reposition their remaining Panzers and anti-tank guns to face the assault.

Sherman Assault of Eastern Flank

Turn 7

The Guards continue their tank assaults, destroying a panzergrenadier platoon.

Turn 8

British Typhoons destroy the last functional Panzer IV and the tank assaults continue. The German infantry finally work up the courage to assault the remaining armoured platoon and manage to destroy it.

The Lieutenant Finds Himself Alone

Turn 9

The Irish Guard decide it it time to fall back, leaving the field to the Germans.

Conclusion

The Guards lost both armoured and both rifle platoons. The Germans lost both Panzer platoons and one Panzergrenadier platoon.

German victory 4-3.

Observations

The game was really over in turn 5, but we had a lot of fun playing it out. The reckless tank assaults changed the game from a 6-1 victory for the Germans to a 4-3 victory. It was surprising to see the Guards continuously make their company morale and bog checks while the Germans repeatedly failed to counterattack or pass their tank terror tests.


Thursday, July 18, 2013

Canadian Armored Recce attacking 21st Panzer Grenadiers in Argences

Canadian Armored Recce Company versus 21st Panzer Grenadier Company
Canadian Armored Recce:                                   21st Panzer:
2 Sherman (CiC and 2iC)                                     2 SMG teams (CiC and 2iC)          
4 Recce Sherman’s                                               Full panzer Grenadier Platoon
2 Stuarts                                                                2 Tiger 1E
2 Stuarts                                                                4 Panzer IV H
4 Sextons                                                              4 12.2cm FH 396(r)
4 M10 with 17lb guns                                          3 Pak 40
2 towed 6lb guns
6 team rifle platoon
 
The mission is Pincer and the Canadians are attacking. Cory and I drew lots this afternoon and played a game. He used the Canadian Armored Recce and I played 21st Panzer Grenadiers.
 
 
The Allies are gaining ground and it is now up the Canadians to take the point. They send to the front of their attack Captain Hubble. He is in charge of his armored company and is up for the challenge. Captain Hubble has been charged to capture the edge of the devastated French town of Colombelles. With this town in allied possession another step in the thousands of steps to free the French people will be accomplished.
 
 
The allies start up by moving as much armor forward. The Stuarts are leading the attack on both sides but the main thrust of the Canadian attack is in the middle and to the north of the town. Most of the force is able to cross the train line and Captain Hubble is keeping a good line of attack. He notices that 2 platoons of Panzer Grenadiers from the veteran 21st Panzer Division are dug in around the town. He starts scanning the town in more detail and discovers nothing. The vibration of his moving Sherman is making his observation efforts almost impossible. He yells down to his driver “Can’t you keep this bloody tank steady!” He does not hear the response of his driver over the load rumbles of the company of tanks.
 
 
Captain Hubble switches his scan from the town to the woods directly to the front of his company when he sees an explosion on the other side of a burned out monastery. This was quickly followed by another and yet another. He recognizes his second in command 1st Lieutenant James Martin yelling at the troops over the command net. He must have keyed his microphone without knowing. “Get back into your bloody tank! Pour some 75 shells into that tree line!” Lt. Martin continued yelling for a good 30 seconds then calmly you heard him say, “Captain Hubble sir, 2nd platoon is out of action. Anti-tank guns in tree line directly ahead of our position. Infantry advancing to take the guns. I am coming up to join your troop sir”. The microphone switched off.
 
 
 As a reaction to seeing the 2nd platoon getting hit, both units of Stuarts and the infantry advance onto the position where the shots were coming from. The OP Sherman, whom was next to Lt. Martin, was able to bring down artillery fire onto the tree line. The Canadians were able to put a lot of firepower onto the position but the Germans were dug in good.
 
The German Pak 40’s returned fire and then neutralized 2 Stuarts in the middle. The angle of the guns as they were set in their ambush was not allowing them to bring fire down onto the north side of the trees. It looks as if the rest of the Canadian Company would be able to slip by this trap.
 
 
Captain Hubble continued his advance with most of his remaining company on the north side of Colombelles. Trying to keep his composure and take decisive action he belts out an order over the radio to the man in charge of his 6lb gun section. “Sergeant Thomas, get your guns unlimbered and neutralize those anti-tank guns before the whole attack is stalled.” All he hears as a response is “Yes, sir”.
 
Sergeant George Thomas gets his 6lb gun battery to unlimber at the edge of the wheat field slightly oblique to the Pak 40’s. “Come on boys; get the lead out of those boats of yours. Get these guns firing onto those kraut bastards!” The battery unlimbers the guns and gets them operational in record time. They start putting shells into the tree line. “Keep the firing up as fast as you can! We need to take them out before they take out are boys over there!” Sergeant Thomas calms himself for a second then reports to Captain Hubble, “Battery unlimbered providing supporting fire for Sergeant Jacobs’s infantry sir. Will hold this position and take those krauts out, sir.” Sergeant Thomas puts down his radio headset and notices the impending assault by his fellow countrymen. “Steady boys. Keep that gun crew pinned down. Watch out for our boys as they look like they are fixing bayonets and are going to take out those guns.”
 
“Good shot Lawrence!” bellows Sergeant Jacobs as he sees the rounds from Pvt. Lawrence’s Bren gun tear apart one of the Pak 40 crews. “That will be less for the rest of you. Okay lads, fix bayonets”. The anticipation is growing in the hearts of the Canadian infantry. “Okay lads, run as fast as you can across this field. You will be safe in their lines and not loitering about in this field. Lawrence, covering fire; Come on lads, follow me!”
 
The Bren gun starts laying down fire as the rest of the platoon runs across the field. Following Sergeant Jacobs the platoon makes it into the defensive works unscathed. Now the real business starts. It is a brutal fight and the veteran German gunners do not want to give up their position. Finally, Sergeant Jacobs’s men, with heavy casualties of their own, are able to take the strongly held position as they watch the remaining Germans running away from them through the woods.
 
 
“They are coming back!” yells Pvt. Jackson as he spots the Germans returning back to the position. As he stands and alerts the rest of the platoon he is then riddled with bullets. He falls into a lifeless heap. His mates in the platoon are in shock and several more are hit by the hard charging Germans. Another bloody hand to hand fight ensues when this time the Germans did not run away; they just lay where they fell. Sergeant Jacobs, now wounded in the shoulder, assess he very few remaining in his platoon.
 
“Keep the advance up. Sextons, range in on the dug in infantry just north of town. 1st platoon prepare to move in on that dug in infantry” barks Captain Hubble as the main body of his company continues the advance North of town. “1st platoon, follow me!” barks Captain Hubble as he charges at the dug in infantry. The platoon is able to kill half of the German infantry before the Captain decides to back off from the fight.
 
 
“Regroup for the next assault 1st platoon” is what Captain Hubble is able to order before he hears over the radio “Panzers to our rear!!” Captain Hubble turns his head in the direction of his M10 tank destroyer section.
 
Sergeant Phelps releases the button on the microphone and commands his tank to rotate the turret 180 degrees. 4 Panzer Mark IV H tanks have infiltrated the Canadian advance and have deployed directly behind the tank destroyers. The young sergeant from the Yukon is frantically yelling for his crew to get that turret around. He increases the volume of his voice after the M10 directly to his right gets slammed by a German shell and explodes. The hiss of shrapnel flying overhead adds to the excitement of the already frantic crew. Then another explosion from the other side and then another. Giving up, Sergeant Phelps orders his crew to abandon tank. The crew jumps over the side and starts running away. Sergeant Phelps looks back just in time to see the M10 he just left explode.
 
 
“1st platoon all rotate turrets east and engage those Panzers!!” Captain Hubble yells over the platoon channel in his radio set. He has now starting to lose the momentum of this fight. He hopes he can destroy this new threat and continue onto the objective. The destroyed M10’s are making perfect cover for the Panzers as the Sherman’s start firing onto this new threat. Captain Hubble cannot assess if his platoons firing is having any effect. “Make sure you load that gun as fast as you can Jones!” barks the Captain.
 
“Firing onto Panzers to your rear sir” is heard in Captain Hubble’s headset. It is 1st Lieutenant James Martin to the rear of the Panzers. “Good flanking position sir, I will have you out of there in a jiffy.”
 
“Captain, guns to the west. Engaging, sir” was heard in the Captain’s headset clearly over the sharp cracks of the 75mm gun. It was Sergeant Smith from the Recce Stuart platoon. Captain Hubble closed his eyes for just a second as he now realized he is being surrounded. He snaps out of it and continues to fire onto the much obscured Panzers.
 
Now realizing he will have to fight his way out of this trap the Captain stops shooting and pops the hatch to see what is happening. The 2 Stuarts to his west are in flames, 3 of the 4 Sherman’s of 1st platoon are up in smoke and the tank crew of number 4 tank are bailing out. “Get back in and let’s get out of here!” the Captain yells. The tank crew responds and gets back into their Sherman tank.
“Hurry up sir I cannot keep them occupied forever. Oh Christ, Tigers!!” then the radio went silent.
 
That was the last Captain Hubble heard of his friend 1st Lt. Martin. He took a second to compose himself then gave orders for the crew to start heading back to the railroad tracks post haste. Just after getting underway a shell hit the tank right in front of the driver. Smoke filled the small confines of the tank and the concussion of the shell blew out the Captain’s eardrums. That was enough. The Captain gave the order to abandon tank and worked his way out of the commander’s hatch. He helped his loader out and they both fell to the ground. The Captain peered up at Number 4 tank which has been turned into a heap of scrap metal.  
 
Collecting himself the Captain grabbed his loader, Corporal Barnes, and tried to get to their feet. Just as the both of them stagger to their feet holding each other for support the Captain notices the German infantry closing in on the two of them. He turned to Corporal Barnes and said “looks like the war is over for us lad.”       
 
 
Germans won 5-2
Thanks for the game Cory!! Hope your dice do not stay so cold.
Michael (crimsonexec)

Friday, July 12, 2013

29th ID Fight Off 352 Counter Attack

Last night a company of the 29th Infantry Division threw back a German counter attack from the a company of the 352 Infantry Division. The Germans came in force, but our boys were ready:

"We were supposed to come off the front line yesterday, but the relief units are too far behind. We were ordered to halt our advance, dig in and hold this position while they get the roads straightened out and get our replacements up here. Of course, we thought we had a day to rest, but around 0900 the word spread that Germans were in the area. I ran up to my post in that house over there and started looking. As soon as I saw them, I spun up the radio and started calling in fire from a battery of 105s."
- Private Malcom Lawson
One of the tensest moments was when a patoon of StuGs advanced on the left flank against Lt. John Bowhill's MG platoon:
"When I saw that StuG break through the hedgerow, I thought it was all over. But we had our orders and the boys held their positions. I called in the arty and those boys popped that StuG like a can of sardines. The rest of them were caught up in the hedgerows. I guess they didn't take well to losing their buddy because they scampered off lickety-split."
- Lt. John Bowhill
The bloodiest battle was on the right flank where Lt. Cliff O'Brian's rifle platoon fended off a grenadier platoon while under heavy fire from a second platoon and a battery of PaK40s.
"When it all started, we jumped across the road so we could make them pay for every inch of ground they tried to take. We held our ground against everything they threw at us. When the assault came, we counter attacked, destroying the platoon."
-Lt. Cliff O'Brian
All in all it was sweeping victory for the company and none are more proud than Captain Jeb Stark:
"I couldn't ask for anything more out of my men or our support. Well, except for those armored boys. They seem to have gotten lost. Fortunately, the air support and artillery fire made up for their absence."
- Captain Jeb Stark

Setup

Scenario

Pincer - Germans attacking, US defending.

Forces

352 ID

HQ, 2x Grenadier Platoons, 1x Grenadier Pioneer Platoon, Mortar Platoon, Anti-tank Gun Platoon (PaK40),StuG Platoon

29th ID

HQ, 3x Rifle Platoons, Weapons Platoon, 2x MG Platoons, Field Artillery Battery, Independent Tank Platoon (Shermans), Air Support

Deployment

The Germans deploy their full force in a wide line. The Americans deploy two rifle platoons, a MG platoon and a Field Artillery Battery along a defensive line. The remaining platoons are kept in reserve.


Turn by Turn

Turn 1

Turn 1 - German Advance
Turn 1 - US Defense
The Germans advance utilizing their storm trooper move where possible. Several StuGs get tangled up in the bocage.

The 29th right flank advances across the road to harass the Germans as they cross the field. In the center, the observer for the artillery battery and a handful of rifle teams pile into the house.

Turn 2

The Germans continue the advance and both sides start to engage. The StuGs continue to struggle with the bocage. US Air Support causes a couple casualties in  one of the German platoons. Unfortunately for the Germans, that platoon remains pinned until the end of the game. 
Turn 2 - Allied Air Support


Turn 3

Heavy fire erupts as the full force of the German lines comes into contact with the Americans. With the cover of the hedgerows, the fire has little effect. On the left flank, a lone StuG clambers through the bocage into the US left flank. However, US artillery delivers a devastating barrage, destroying the StuG. Since the remainder of the platoon is bogged down, a morale test is forced and the platoon routes. A huge turning point for the allies!

Turn 3 - Destroyed StuG
Turn 3 - Right Flank Standoff


Destroyed - StuG Platoon
Reserves - None

Turn 4

Turn 4 - Germans Prepare to Assault
With the assault on the left broken, the Germans focus on the right flank and attempt to assault across the field. They pin the Americans and make contact, but are reduced to a handful of men and thrown back by a vicious American counter attack.

Destroyed - Grenadier Platoon
Reserves - None

Conclusion

The German commander assesses his situation:
- two platoon destroyed (StuG, Grenadier)
- one platoon ineffective (still pinned and at least one turn from reaching the action)
- a grenadier platoon, mortar platoon and a half strength anti-tank platoon in the action
- light casualties for the Americans (3 teams)
He decides to live to fight another day and retreats to setup a defensive line.

Germans Call Off the Attack
Allied victory 6-1.

Observations

As with all great victories, this one can be attributed to a good plan made great by a lot of luck. The German players were plagued with poor rolls for bog checks and rallying pinned troops. This fragmented the assault and gave the US more time to utilize their air support. Destroying the StuG platoon and repulsing the assault on the right flank were amazing feats of luck for the Americans.

Sunday, July 7, 2013

British Airlanding Company versus German Festungkompanie

Operation Unicorn

Seize and Hold mission for Flames of War

I brought my adhoc German force over to Jamie's house for some 4th of July fireworks. Jamie ran his British Air Landing Company complete with 4 gliders assaulting Unicorn bridge. I played the unaware Germans which I built a force using the Festungskompanie out of Earth & Steel modeled after the 716 Infanteriedivision. We used the Seize and Hold scenario.
 
Here is the setup:
Holding one objective is a platoon of grenadiers and a unit of Luftwaffe 88mm guns. In a strong defensive position between the canals is another grenadier platoon and the company headquarters. On the far side of both canals is a battery if 15.5cm guns and a unit of 3.7cm flak guns.

Just after midnight the gliders landed. 3 out of the 4 gliders reached the area and 1 of those 3 crash landed killing just under half of the platoon. The other 2 gliders landed perfectly. Captain Mott lead his troops out of the gliders and after some fierce hand-to-hand fighting took the positions away from the German defenders.
 

A unit of Tetrarchs have appeared on the board just on the other side of the town as the Coup-de-Main.

The Germans, trying to organize themselves, load up the 3.7cm flak guns and try to get them over to the action but the trucks are not navigating the woods very well at night. A well, placed observer tries to find the tanks in the night but can only hear them and not see them.
 
Turn 2
 
The Paras on the glider which landed off the table arrive behind the Tetrarch platoon. They start heading towards the objective. In their way is an HMG nest which is neutralized without much effort. A small detachment of Paras occupy the building covering the bridge. 


The Germans get a platoon of grenadiers which arrive just down the road from the positions held by the Paras in the trench lines. They try to make it into the woods overlooking the Paras position but are not fast enough to get the entire platoon under cover. The flak guns are still having problems getting the trucks out of the woods.


Turn 3
 
The small artillery platoon arrives on the board for the Paras, They arrive on the heals of the grenadier platoon which just made it onto the field. They are very impetuous and after firing some of the teams charge the grenadiers. This turned out to be a bit much as the grenadiers beat them back and almost wiped out the entire platoon. The Tetrarchs supported by the infantry platoon come to support their artillery unit.
Just after this combat morning breaks and a unit of 4.7cm anti-tanks guns roll onto the field behind the Tetrarchs which they bail one of the airborne tanks. The spotter can now see the tanks and call in the artillery. The battery is able to bail another Tetrarch. The grenadiers, hungry to eliminate the airborne artillery, charge the remnants of the force but are unsuccessful. A combination of defensive fire and bad hand-to-hand skills (or die rolls) result in most of the grenadier platoon being killed.
Hauptman Lewis gets his troops going out of their trench line and moving to cross the canal. The flak guns are slowed by the ford but are trying to get into the fight.
Turn 4

1 of the Tetrarchs remounts and they use their speed to get to the rear of the anti-tanks guns. After their murderous fire the anti-tank platoon abandons their guns and runs. The Paras in the trenches fire upon the floundering grenadiers killing one more team.
A platoon of Stugs arrive on the fair side of the field between the canals. They double-time up to the bridge. They are hoping to make a difference in this fight. The Hauptman gets the grenadier platoon to get to the bridge and starting to cross. The Trained artillery are still not making a difference as they range in on the Tetrarch platoon but do not score any hits.


Turn 5

The Paras outside the trench lines try to occupy the buildings of the town but are finding entering the buildings is harder than it looks. The Paras in the building covering the bridge open up on the infantry in the open. This was devastating to the Germans as they fail 5 of 6 saves and the platoon runs.

The Ost Platoon for the Germans arrive next to the battered grenadier platoon just outside the Paras trench line. This is the last chance for the Wermacht. All of the firepower (flak guns, Stugs and artillery) are ineffective. As the Germans last hurrah, the Ost Platoon tries to assault the Paras trench line and contest the objective. In the Paras defensive fire they obliterate the platoon and the rest run away.


Wrap up


This was a 6-1 victory for Jamie! Great job mate!

The Paras did not lose a single platoon but some were badly damaged. On the other hand the Germans lost 3 grenadier platoons, 1 Ost platoon, 1 88 platoon and 1 anti-tank platoon.

This was a very fun game and a great scenario!! I took a different force than I told Jamie earlier and this proved to not phase him. Thanks mate for the great game and looking forward to the next one!!